Steps for the Activity
-
[5 mins] Break into Groups. No one has to work alone! Try to keep your groups to 5 people or less, so that each participant has a chance to share their thoughts. Give each group a stack of post-it notes and a marker or pen.
-
[20 mins] Define the Scrum Tasks
Instruct learners that they should write 1 post it per question, per person, but that they should discuss the exercise so that the responses benefit everyone.
- What do you want to learn today?
- What would you make to teach reading and writing, using the tools we showed you a few minutes ago?
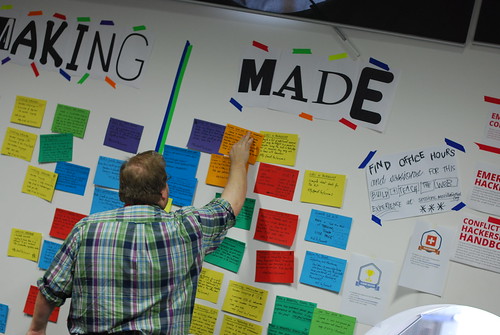
Have everyone post their post it notes on a wall. Next, have participants read each others post-it notes and categorize them into overarching categories. Facilitate the organization procedure so that everyone gets involved. Have participants shout out categories, write category names on new post-its, and move post-its into columns underneath the category label. It should look like a mosh pit of collaboration.
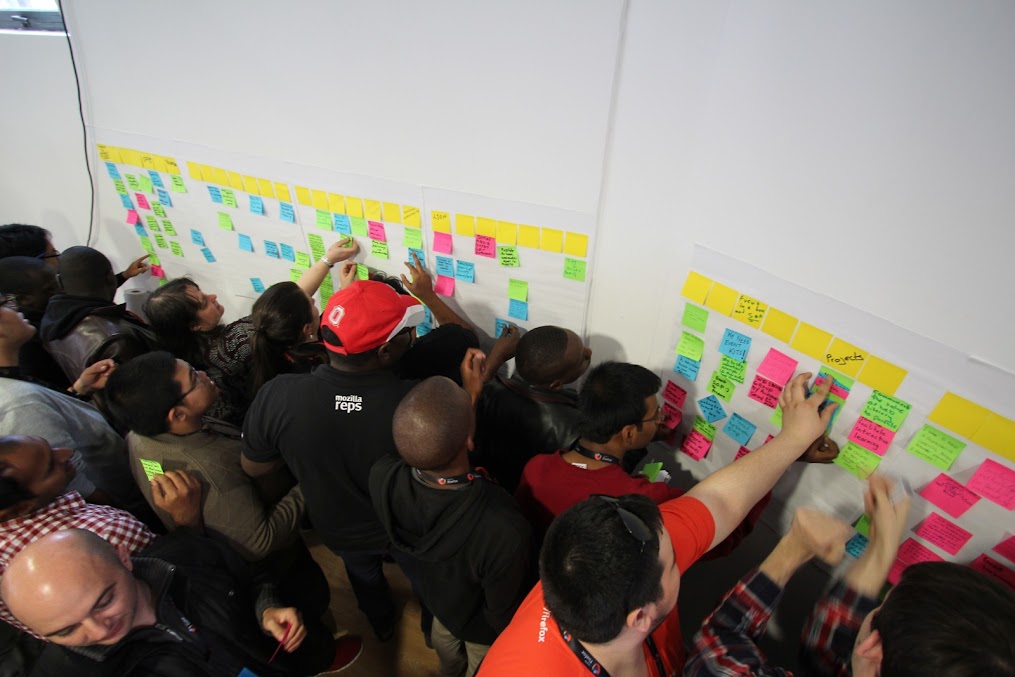 Photo by Pierros Papadeas
Have participants put stars on the things that can be MADE.
-
[20 mins] Collaborate to make what's on the wall
- How much can we get done!? Break into small groups again. Tell participants to feel free to choose new groups!
- Then, in small teams, choose post-its you want to work on, and start brainstorming about the stuff you're going to make. Write down plans, notes and sketches!
- Regroup for a few minutes and have each group can present the best ideas. Careful, this is going to be speedgeek format! Each group has 30 seconds to talk, 30 seconds to listen to others. Use a timer and have folks give speedy feedback.
-
[20 mins] Start Hacking
- Go back into teams and focus on the ideas that got the most traction.
- Start drafting the prototypes on paper. This helps formulate ideas and exposes any holes.
- Consider design elements to simplify and improve the user's experience.
-
[55 mins] Sprint to Finish
- Keep refining the paper prototype or using other techniques and tools, like X-Ray Goggles, Thimble, or Popcorn.
- Teams sprint to finish their "minimum viable prototype."
- Each team prepares a short demo or presentation of their project.
-
[15 mins] Closing Circle
Use the discussion section to help people talk about their work.
Materials
- Markers or pens
- Post-its
- Paper
- Computers
- Web Access
Discussion
If you like, share your prototypes with the world! You can publish the links and other materials to a blog or the social network of your choice.
Please tag your work with #teachtheweb
You may also want to ask questions like:
- What did you make?
- What did you learn?
- Do you have questions?
- How would you like to follow up?
- Were you excited?
- Did you have fun?
- What will you do next?
- How would you change this workshop?